Pouring concrete in winter presents unique challenges that can significantly impact the strength, durability, and appearance of the final product. For homeowners and businesses in Las Vegas looking for professional concrete services, understanding these challenges is key to ensuring a long-lasting result.
This article will explore the critical considerations, potential risks, and essential tips and precautions for successfully pouring concrete in cold weather. Understanding these factors is crucial to prevent common cold-weather concrete problems like reduced strength, cracking, and surface scaling, ensuring your winter concrete project stands the test of time.
The Challenges of Cold Weather Concreting
Cold weather significantly impacts the hydration process of concrete, which is the chemical reaction between cement and water that gives concrete its strength. When temperatures drop, this reaction slows down considerably, leading to several potential problems:
Slowed Hydration and Strength Gain
At lower temperatures, the chemical reactions within the concrete mixture proceed at a much slower rate. This means that the concrete takes longer to gain strength, potentially delaying construction schedules and increasing the risk of damage if the concrete is subjected to loads too early.
Below 40°F (4°C), the hydration process slows significantly, and below 25°F (-4°C), it virtually stops. If concrete freezes before it gains sufficient strength (typically around 500 PSI), it can suffer permanent damage, leading to a significant reduction in its ultimate strength and durability.
Freezing of Fresh Concrete
The most critical risk in cold weather is the freezing of fresh concrete. If the water in the concrete mix freezes before the concrete has gained enough strength to resist the expansive forces of ice, the internal structure of the concrete can be severely disrupted. This can lead to a significant loss of strength, reduced durability, and surface scaling or spalling. This damage is often irreversible, necessitating costly repairs or complete replacement of the concrete.
Increased Risk of Cracking
Cold weather can contribute to various types of cracking. Rapid cooling of the concrete surface can induce thermal stresses, leading to surface cracks. Additionally, if the concrete freezes and thaws repeatedly during the early curing stages, it can lead to internal micro-cracking, which weakens the concrete and makes it more susceptible to future damage. Differential cooling between the surface and the interior of the slab can also cause stress and cracking.
Delayed Setting Time
Lower temperatures prolong the setting time of concrete. This can be advantageous in some ways, as it allows more time for finishing operations. However, excessively delayed setting can expose the concrete to longer periods of vulnerability to freezing, rain, or snow, and can also delay subsequent construction activities.
Reduced Durability and Permeability
Concrete poured and cured in cold weather without proper precautions often exhibits reduced long-term durability. It can become more permeable, allowing water and de-icing salts to penetrate more easily, which accelerates deterioration, especially in freeze-thaw environments. This increased permeability can also make the concrete more susceptible to chemical attack and abrasion.
Aesthetic Issues
Cold weather concreting can also lead to aesthetic problems. Uneven curing due to temperature variations can result in discoloration or a patchy appearance. Surface scaling, pop-outs, and other defects are more common when concrete is exposed to freezing temperatures during its early life.
Understanding these challenges is the first step in mitigating the risks associated with cold weather concrete pouring. Proper planning and adherence to specific cold weather concreting practices are essential to overcome these obstacles and ensure a successful outcome.
Tips and Precautions for Cold Weather Concrete Pouring
Successfully pouring concrete in winter requires meticulous planning and adherence to specific cold weather concreting practices. By implementing these tips and precautions, you can significantly reduce the risks associated with low temperatures and ensure a durable, high-quality concrete slab.
1. Plan Ahead and Monitor Weather Forecasts
- Optimal Temperature Range: Aim to pour concrete when the ambient temperature is above 40°F (4°C) and rising. Avoid pouring if temperatures are expected to drop below freezing within 24-48 hours after placement, especially if the concrete has not yet gained sufficient strength.
- Schedule Wisely: Schedule pours for mid-day when temperatures are typically at their highest. Avoid early morning or late evening pours during winter months.
- Contingency Plans: Have a clear plan for protecting the concrete if an unexpected cold front or severe weather arrives.
2. Prepare the Subgrade and Forms
- Thaw Frozen Ground: Ensure the subgrade is completely thawed and free of ice and snow. Frozen ground can cause differential settlement as it thaws, leading to cracks in the concrete — a common issue in concrete driveway repair and replacement if the subgrade isn’t prepared correctly. Use heaters or insulating blankets to thaw the ground if necessary.
- Warm Forms: Remove any ice or snow from forms and rebar. Consider warming the forms with heaters or hot air blowers to prevent the concrete from losing heat too quickly upon contact.
- Moisture Control: Prevent the accumulation of standing water or ice in the pour area.
3. Adjust the Concrete Mix
- Use Air-Entrained Concrete: Air entrainment creates microscopic air bubbles within the concrete, providing relief for internal pressure caused by freezing water. This significantly improves freeze-thaw resistance. It is essential for any concrete exposed to freeze-thaw cycles.
- Lower Water-to-Cement Ratio: A lower water-to-cement ratio results in denser, stronger, and less permeable concrete, which is more resistant to freezing. Use water-reducing admixtures to achieve desired workability with less water.
- Accelerating Admixtures: Non-chloride accelerating admixtures can speed up the hydration process, allowing the concrete to gain strength more quickly and reduce its vulnerability to early freezing. Calcium chloride can be used, but with caution, as it can contribute to rebar corrosion and discoloration.
- Heated Mix Water/Aggregates: Concrete suppliers can provide heated mix water and aggregates to ensure the concrete arrives at the job site at an optimal temperature (typically between 50°F and 70°F or 10°C and 21°C). Do not overheat the mix, as this can lead to flash setting.
4. Proper Placement and Finishing
- Minimize Exposure Time: Place and finish the concrete as quickly as possible to minimize its exposure to cold air. Have all necessary tools and personnel ready before the concrete arrives.
- Avoid Over-Finishing: Excessive finishing can bring too much water to the surface, leading to a weaker, less durable surface that is more susceptible to scaling and dusting.
- Protect from Wind: Wind can rapidly evaporate surface moisture, leading to plastic shrinkage cracking. Use windbreaks or temporary enclosures to shield the fresh concrete.
5. Implement Effective Curing and Protection
This is perhaps the most critical step in cold weather concreting.
- Maintain Temperature: The concrete must be kept above 40°F (4°C) for at least 3 to 7 days (or until it reaches 500 PSI). This can be achieved using:
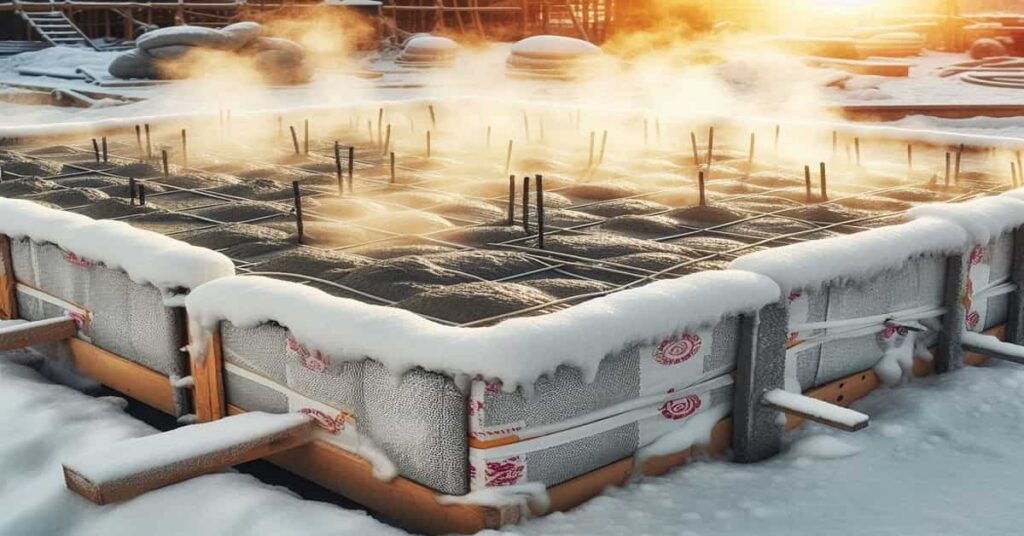
- Insulating Blankets/Tarps: Cover the concrete immediately after finishing. These blankets trap the heat generated by the concrete’s hydration process.
- Heated Enclosures: For larger or more critical projects, construct temporary heated enclosures over the concrete. Use indirect heaters to avoid exposing the concrete to dry, hot air, which can cause rapid drying and cracking.
- Moisture Retention: While maintaining temperature, also ensure the concrete remains moist. This can be done by leaving insulating blankets slightly damp or by using curing compounds under the blankets.
- Monitor Temperature: Use thermometers placed within the concrete and under the protective coverings to monitor temperatures continuously. Adjust heating and insulation as needed.
- Gradual Cooling: After the initial curing period, allow the concrete to cool gradually to ambient temperatures. Rapid cooling can induce thermal shock and cracking.
6. Avoid De-icing Salts in Early Life
Do not apply de-icing salts (like sodium chloride or calcium chloride) to concrete surfaces during the first year after placement, especially if the concrete was poured in cold weather. These salts can cause severe surface damage, including scaling and spalling, particularly if the concrete has not fully matured and gained sufficient resistance.
By diligently following these precautions, you can successfully pour concrete in winter and achieve a durable, long-lasting result that meets all performance requirements.
FAQs
Q1: What is the minimum temperature for pouring concrete?
While concrete can technically be poured at temperatures as low as 20°F (-7°C) with significant precautions, it is generally recommended to pour concrete when the ambient temperature is at least 40°F (4°C) and rising. The concrete itself should be maintained above 40°F (4°C) for at least 3 to 7 days after placement to ensure proper curing and strength gain.
Q2: How long does concrete need to be protected from freezing?
Concrete needs to be protected from freezing until it has gained sufficient strength, typically around 500 PSI. This usually takes about 24 to 48 hours under ideal conditions (above 50°F or 10°C). In cold weather, with proper admixtures and protection, this period can be extended, but continuous protection for at least 3 to 7 days is recommended to ensure adequate strength development and durability.
Q3: Can I use antifreeze in concrete?
No, you should never use automotive antifreeze in concrete. Antifreeze contains chemicals that can severely disrupt the hydration process, weaken the concrete, and cause long-term durability issues. Instead, use specially formulated non-chloride accelerating admixtures designed for cold weather concreting, which speed up the setting and strength gain without harmful side effects.
Q4: What are the signs of freeze damage in concrete?
Signs of freeze damage in concrete can include surface scaling, spalling (flaking or chipping), pop-outs, and a general reduction in strength and durability. If the concrete freezes before it gains sufficient strength, it may appear crumbly, weak, or have a significantly reduced compressive strength, leading to premature failure.
Q5: Is it more expensive to pour concrete in winter?
Yes, pouring concrete in winter is typically more expensive than pouring in warmer months. The additional costs come from the need for specialized cold weather admixtures, heating the concrete mix, providing insulating blankets or heated enclosures, and potentially increased labor costs due to the extra precautions and slower work pace. However, sometimes project deadlines necessitate these additional expenses.
Conclusion
Pouring concrete in winter is a challenging but achievable task, provided that meticulous planning and stringent precautions are observed. The primary risks associated with cold weather concreting—slowed hydration, freezing of fresh concrete, and increased cracking—can be effectively mitigated through a combination of proper mix design, thorough subgrade preparation, careful placement, and, most critically, effective curing and protection.
By utilizing air-entrained concrete, appropriate admixtures, and maintaining the concrete’s temperature above freezing for the critical initial days, you can ensure that your winter concrete project achieves its designed strength and durability. While the process may involve additional costs and effort compared to warmer weather pours, adhering to these best practices will safeguard your investment and result in a long-lasting, high-quality concrete structure. Always prioritize safety and consult with experienced concrete professionals when undertaking cold weather concrete work to ensure the best possible outcome.